

Execute ML.NET Model in .NET Framework demo application
This article should help you solve the issue ML.NET has with .NET Framework. Once, you have the model built you need to reference the ML.NET libraries in your .NET Framework project. This works fine for .NET Core but there are quite a lot of issue in .NET Framework.
If you are like me, you still have active projects under the .NET Framework. And if you want to use your machine learning model in your project, you may have encountered multiple different errors. Anything from trouble referencing the libraries to the app being unable to load TensorFlow library.
If this sounds familiar, then you are at the right place. ML.NET is still under development. There are kinks and bugs being solved at this moment. Some of them pertain to the .NET Framework. This article will explain how you can use your model by creating a simple but effective workaround.
So, let’s get started.
Windows Forms .NET Framework Application
Some time ago, we tried out the ML.NET Model Builder by creating a Cat vs Dog Classifier. We ended the post there. Now we want to consume our model inside a Windows Forms .NET Framework application.
How to use ML.NET Model Builder for Image Classification
As you expected referencing the classifier was quite difficult. Especially if you use an older framework version like 4.5. But there is a way to do that. Before we dive into the solution, we will discuss the application.
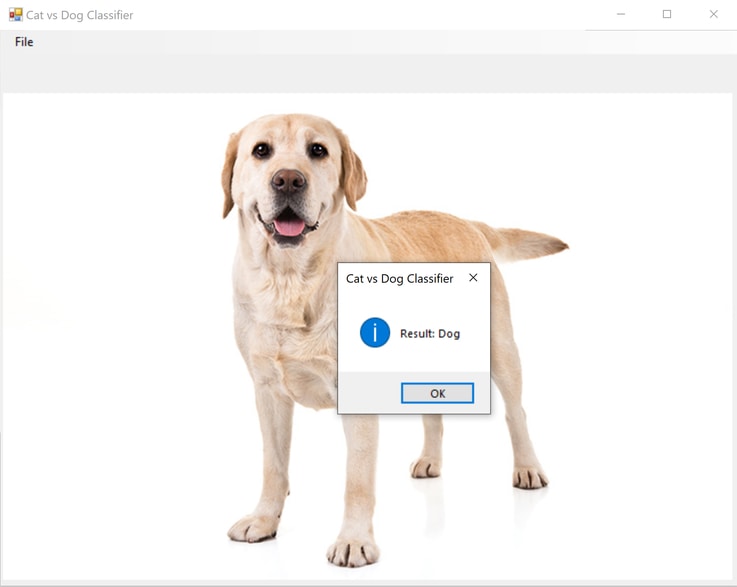
To demonstrate how to use the ML.NET Model inside a .NET Framework project I built a very simple demo app. It allows the user to pick an image from the File -> Open Image menu. Then by clicking File -> Classify the app will make a call to the model and present the result inside an information message box.
The Solution
To achieve the desired result, we must set up the following pipeline. A command from the .NET Framework application is sent to a .NET Core app hosting the model. The .NET Core app executes the model with the sent parameters and returns the results to the caller.
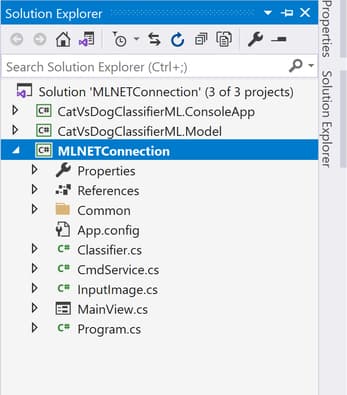
In this case, our working .NET Framework application is the MLNETConnection. On the other side we have CatVsDogClassifierML.ConsoleApp that has a reference to the ML.NET trained model. This .NET Core application can take an image file path as an input, pass it to the ML.NET model and classify it, then print the result out. At the very end of this pipeline is the CatVsDogClassifierML.Model. Just like the name suggest this a Class Library that loads and utilizes the trained model.
ML.NET Model Class Library
This library created by the ML.NET Model Builder is responsible for loading up the model and creating the prediction engine.
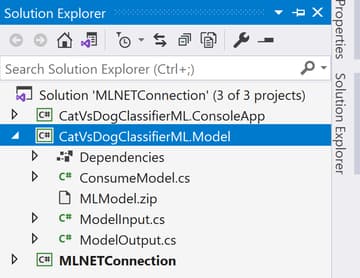
Inside there is a file called MLModel.zip. This is the model produced by ML.NET. The ConsumeModel class will load it up and create the prediction engine like so:
public static PredictionEngine<ModelInput, ModelOutput> CreatePredictionEngine()
{
    MLContext = new MLContext();
    string modelPath = @"MLModel.zip";
    ITransformer mlModel = mlContext.Model.Load(modelPath, out var modelInputSchema);
    var predEngine = mlContext.Model.CreatePredictionEngine<ModelInput, ModelOutput>(mlModel);

    return predEngine;
}
This class hosts one more function called Predict which accepts a ModelInput parameter.
public static ModelOutput Predict(ModelInput input)
{
     ModelOutput result = PredictionEngine.Value.Predict(input);
     return result;
}
The ModelInput class has two properties. ImageSource and Label. The Image Source property holds the physical path to the image we want to classify. And because Neural Nets are a Supervised type of Machine Learning we are passing the Label as an input as well. The ModelOutput has two properties. Prediction and Score.
However, this demo we will populate only the Image Source for the input, and we will display the Prediction field from the output. We don’t need the Label since we are not going to be training the model, and we don’t need the Score since we want to print out the class label stored in Prediction.
.NET Core Console Application
The .NET Core console application references and consumes the ML.NET Model created by the Model Builder.
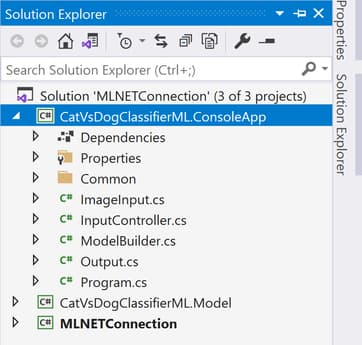
The goal is to launch this console application from our .NET Framework Windows Forms app. Then all we want to do is pass the image file path to classify it, and present the output.
C#: execute ML.NET Model in .NET Framework:
static void Main(string[] args)
{
     new InputController((line) => line.Trim().ToLower().Equals("q"))
       .ReadLine((line) => new ImageInput(line).IsValidInput((imageFilePath) =>
                      Output.PrintResult(Console.WriteLine,    ConsumeModel.Predict(new ModelInput() { ImageSource = imageFilePath }).Prediction,args)));
}
The Input Controller class will read a string line indefinitely from the console until the character “q” is detected. Next, that line is passed to the Image Input class to check if the line is an actual path that points to an image file. If it does, the Consume Model static class will read in the image and make a prediction. That prediction is then printed on the console.
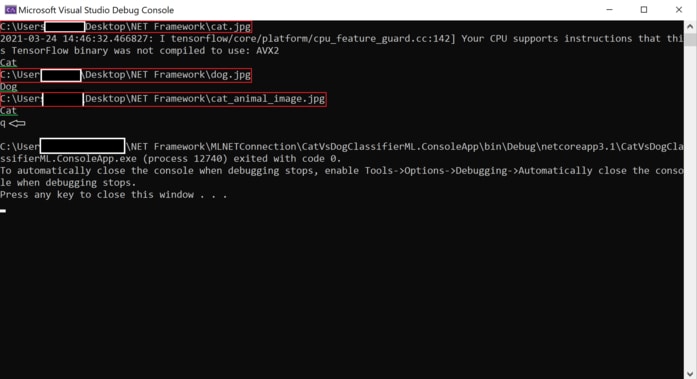
Here you can see I am manually entering an image path. Then the ML.NET model is initialized and finally a prediction is made. Then I am doing the same for two more images, until I press the letter “q” to exit the application.
We will do the same process from the .NET Framework application.
.NET Framework Application
So, we need a way to pass a file path to an image, and get the result back. We already have the solution described in more detail here:
Execute Command Prompt commands from C#
Because we already have the CMD Service code, we can only focus on what matters in this solution. And that is calling the application and retrieve the output.
Let us check the code:
public class Classifier
{
   private CmdService _cmdService;
   private const string RESULT_LINE = "Result:";
   public Classifier(string classifierAppPath)
   {
      _cmdService = new CmdService(classifierAppPath, RESULT_LINE, (data) => data.StartsWith(RESULT_LINE));
   }
   public void Classify(string imageFilePath,Action<string>classify)=>
            classify(_cmdService.ExecuteCommand(imageFilePath));
}
As you can see the Classifier class hosts the Command Line Service. To create an instance from it you must pass three parameters. The first one is the path to the application you would like to launch. The second one is used as a key word that is going to be appended to the result. This way we know at which line the ML.NET Model prints out the result. Finally, we pass in a predicate that will return true when the result is returned.
For example:
We can pass the following path: C:\Images\Test\animal.png
Then the application will return: Result: Cat
We need this because there might be some warnings returned, or other information that we do not need. By prefixing the classifier result with the string “Result: “ we know exactly where to look for it.
C# Code Walkthrough
Execute ML.NET Model in .NET Framework
If we look at the code, we can see two properties in our MainView.
private readonly InputImage _inputImage = new InputImage();
private readonly Classifier _classifier = new Classifier(@"""…CatVsDogClassifierML.ConsoleApp\bin\Debug\netcoreapp3.1\CatVsDogClassifierML.ConsoleApp.exe""");
The input image class is responsible for loading an image, and verifying that the path is in the correct form.
To open an image, we can simply use the following statement:
new OpenImageFileDialog().OpenImage(
 (imageFilePath) => _inputImage.LoadImageFromFilePath(imageFilePath,                             (bmp) => pictureBox.Image = bmp));
To classify the image, we call the Classify method from our Classifier instance. It takes two parameters. One is the image file path and the second is an Action Delegate which allows us to process the returned result. All we want to do is show an informational message box and display the resulting string.
private void classifyToolStripMenuItem_Click(object sender, EventArgs e) =>

_inputImage.HasImageLoaded((imageFilePath)=>
    _classifier.Classify(imageFilePath,
          (result) => MessageBox.Show(result,AppGlobals.AppName,MessageBoxButtons.OK,MessageBoxIcon.Information)));
The important thing to note here is to check the constructor of the Classifier class. As a parameter it takes a path to the .NET Core application that has the model referenced and ready to use. The Classify method on the other hand, writes the image file path to the console of that application. Then the image is loaded, classified and the result is returned. On the main app, the delegate is executed when the ML.NET Model result is returned. Finally, it is displayed in a message box.
Conclusion
I expect that Microsoft will resolve all problems related to this very soon. But, until such time comes, this would be my go-to solution when I want to embed ML.NET into an already existent .NET Framework application
dieBachs
March 31, 2021 at 8:43 amThank you for the explanations, especially as I wondered after your image classification post on bringing this into a nice GUI. As I am not a professional programmer, I failed to finalize the program as there seem to be some changes to the previous version, and I somehow struggle with MLNETConnection. Could you please explain in more detail or provide the project data?
vanco
March 31, 2021 at 9:34 amHi, the complete solution is around 1GB so I can temporary upload it at some location.
So, if you have the classifier projects ready (generated by the model builder) then you are ready to build the GUI.
To build the Windows Forms project (GUI), you need the following tutorial: https://code-ai.mk/execute-command-prompt-commands-from-c/
Inside your GUI project you should have a CMD Service that will call and execute the .NET Core console application. Also make sure to copy the MLModel.zip inside your GUI bin project. If you have more details about the error you are getting, please let me know.
Dona
April 18, 2021 at 9:19 pmPlease can you share us the codes from MLNETCONNECTION files? ( AppGlobals.cs, InputImage.cs, Program.cs)
I don’t know how to write the Appglobals and InputImages, and I have 1 error with Classifier calling the CmdService.
(and yeah I followed your CMDSERVICE tutorial)
vanco
April 19, 2021 at 6:58 amHi, I did check but I don’t currently have the project with me. When I get it I will upload the complete solution on the post.
Dona
May 12, 2021 at 4:04 amThank you Vanco, I hope you can share the project with us
ubaTaeCJ
March 12, 2024 at 10:10 pm1
vpn code 2024
April 1, 2024 at 7:32 amYou have made some decent points there. I looked on the web
for more info about the issue and found most people will go along with your views on this site.
my website … vpn code 2024
vpn special code
April 11, 2024 at 3:51 pmHi there this is kinda of off topic but I was wondering if blogs use WYSIWYG
editors or if you have to manually vpn special code with HTML.
I’m starting a blog soon but have no coding know-how so
I wanted to get advice from someone with experience.
Any help would be greatly appreciated!